
Single sign-on (SSO)
Tabs
Single sign-on (SSO) lets the members of your team sign in to FormCan with the account they already use at work. Your identity provider (Okta, Microsoft Entra ID, Google Workspace or any provider that supports SAML 2.0 or OpenID Connect) checks who they are and enforces your password and multi-factor rules. FormCan then signs them in to your team.
Guides for your identity provider
- Okta: Set up single sign-on with Okta, with OpenID Connect or SAML 2.0.
- Microsoft Entra ID: Set up single sign-on with Microsoft Entra ID, with OpenID Connect or SAML 2.0.
- Google Workspace: Set up single sign-on with Google Workspace, with a custom SAML app.
- Another provider with SAML 2.0: Set up single sign-on with SAML 2.0.
- Another provider with OpenID Connect: Set up single sign-on with OpenID Connect.
Single sign-on is included in the Gold plan and above, including custom plans. See the plans page to compare plans.
Before you begin
Make sure you have the following:
- The right access in FormCan: you are the team owner, or a member with the Manage members access.
- An administrator at your identity provider: someone who can create an application there.
- Access to your DNS records: you prove that you own your email domain with a TXT record. A domain your team already verified for sending email in FormCan is accepted without a new record.
Open the Single Sign-On page
-
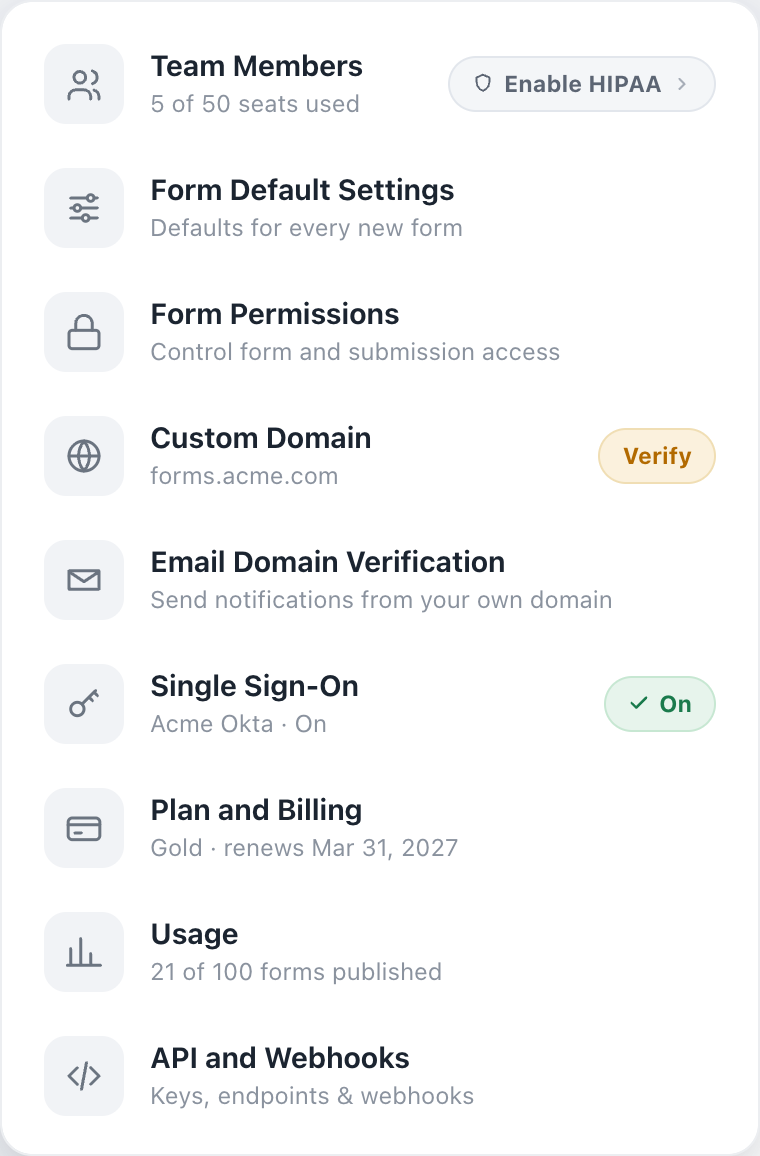
In the left navigation, click your team name.
-
From the menu, select Single Sign-On.
How the page is organised
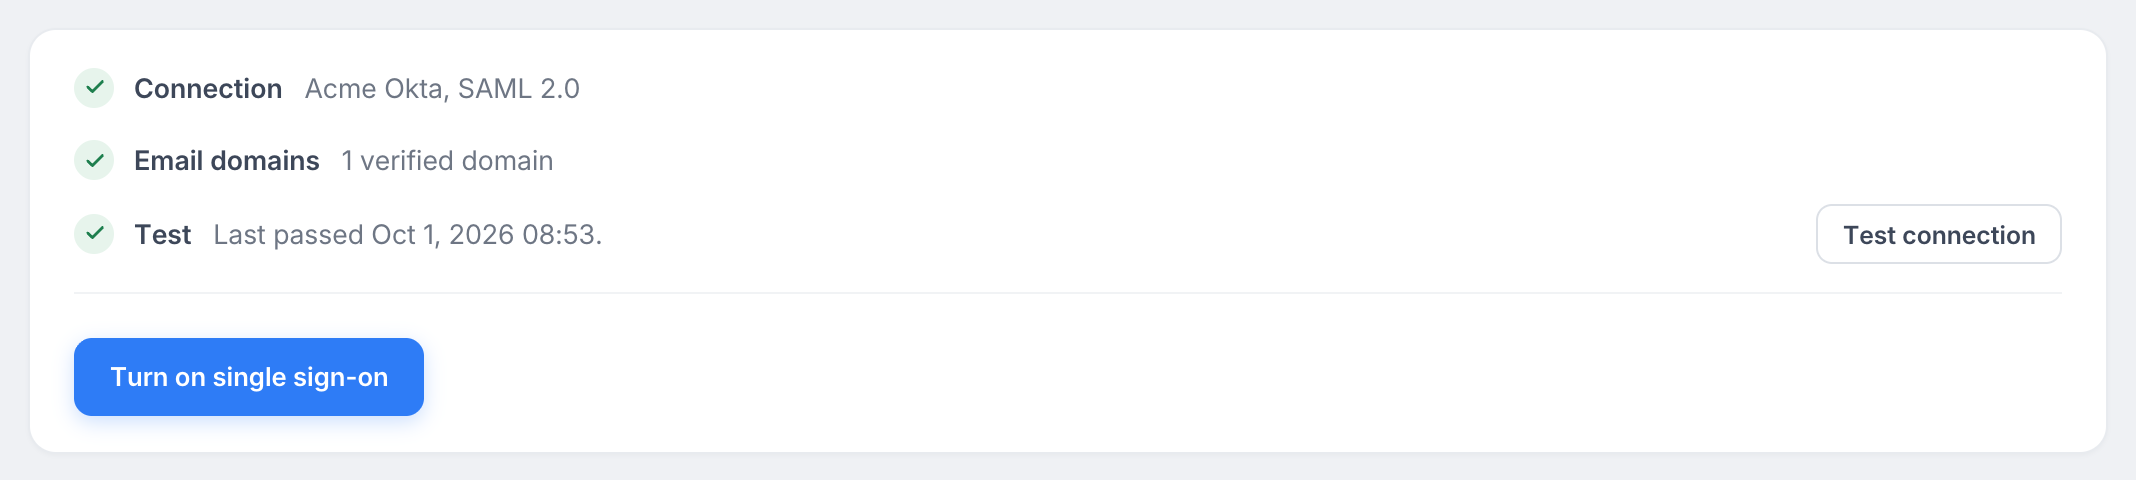
The card at the top shows your progress. It lists three steps, Connection, Email domains and Test, each with a tick once it is done. The Test connection button and the Turn on single sign-on button are also in this card, so you can reach them from every tab.
Below the card there are three tabs:
- Connection: the values you exchange with your identity provider. Save with Save connection.
- Email domains: the domains whose addresses may sign in. Each action applies at once.
- Sign-in rules: who has to use single sign-on, who can join, and how long a session lasts. Save with Save rules.
Step 1: Connect your identity provider
-
On the Connection tab, pick your provider under 1. Identity provider. For Okta and Microsoft Entra ID, also pick OpenID Connect or SAML 2.0. Both work; OpenID Connect has fewer values to copy.
-
Under 2. Values for your identity provider, copy the values FormCan shows into the application you create at your provider.
-
Under 3. Values from your identity provider, paste the values your provider gives you.
-
Click Save connection.
The guides listed at the top of this page give the exact steps for each provider.
Step 2: Verify your email domains
Only addresses on domains you have verified can sign in through your connection. This stops anyone else from claiming your company’s addresses.
-
Open the Email domains tab.
-
Under Add a domain, type your company domain, for example
acme.com, and click Add domain. -
FormCan shows a TXT record. Add it at your DNS provider for the domain itself (the domain apex), then click Verify.
Good to know:
- DNS changes can take a few minutes to become visible. If Verify does not succeed at once, try again a little later.
- A domain your team already verified under Email Domain Verification is verified here immediately.
- Sub-domains are separate. Add
mail.acme.comas its own domain if your addresses use it. - Public mailbox domains such as
gmail.comcannot be added. - A domain can belong to one team only. If your domain is already claimed and you own it, contact [email protected].
Step 3: Test the connection
-
In the status card, click Test connection.
-
A window opens at your identity provider. Sign in with an account whose email is on one of your verified domains.
-
FormCan shows the result: the email and name it received, and the names of the attributes or claims your provider sent.
A test never creates an account and never signs anyone in. If the name is missing, compare the attribute or claim names in the result with the names under Advanced on the Connection tab.
Step 4: Turn on single sign-on
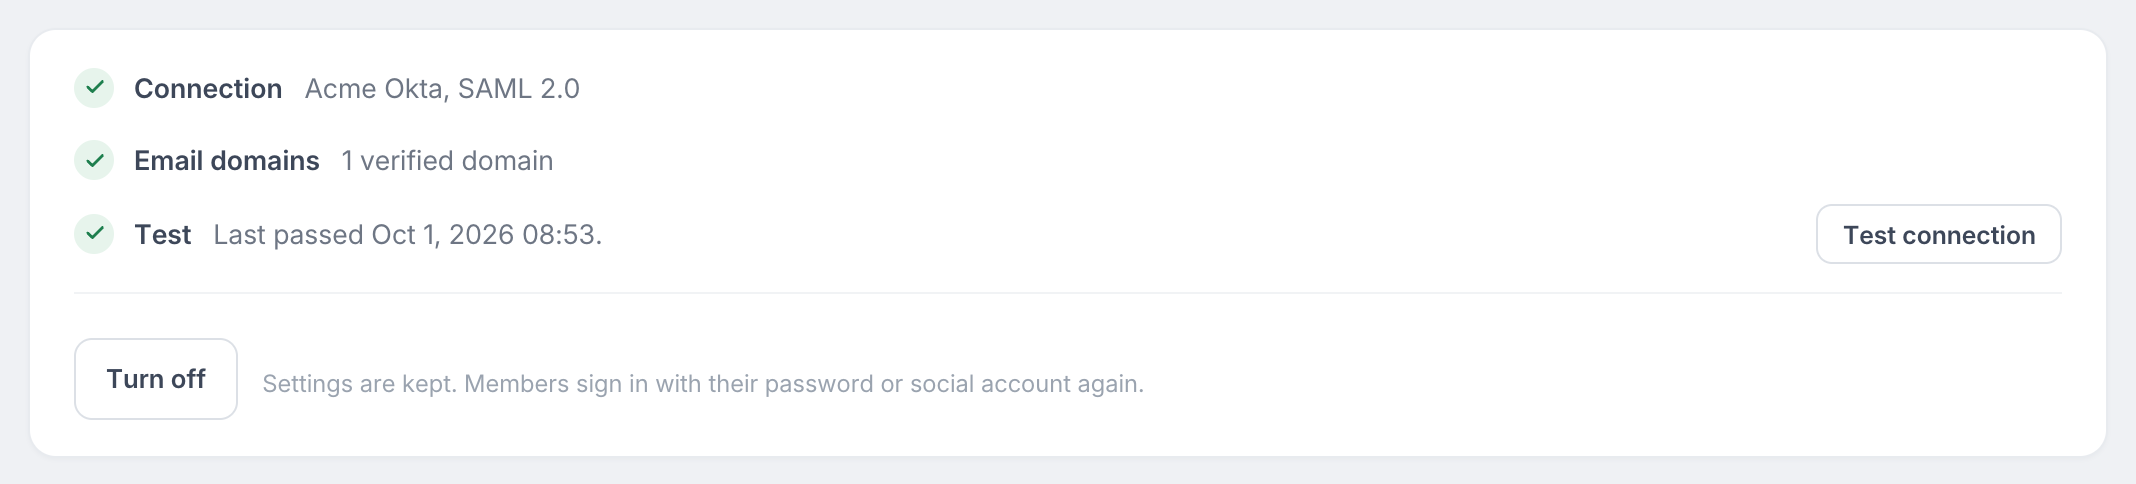
When all three steps have a tick, click Turn on single sign-on in the status card. Members with an address on a verified domain can now sign in through your identity provider.
How members sign in
Members can start from FormCan or from your identity provider:
-
From the FormCan login page: click SSO, enter the work email and click Continue. FormCan sends the member to your identity provider and back.
-
From the start URL: the Connection tab shows a start URL for your team. Members can bookmark it; it goes straight to your identity provider.
-
From your identity provider: the FormCan application tile in Okta, My Apps or the Google app launcher signs the member in directly.
If a member already has a FormCan account with the same email address, single sign-on signs them in to that account. Nothing is duplicated.
Sign-in rules
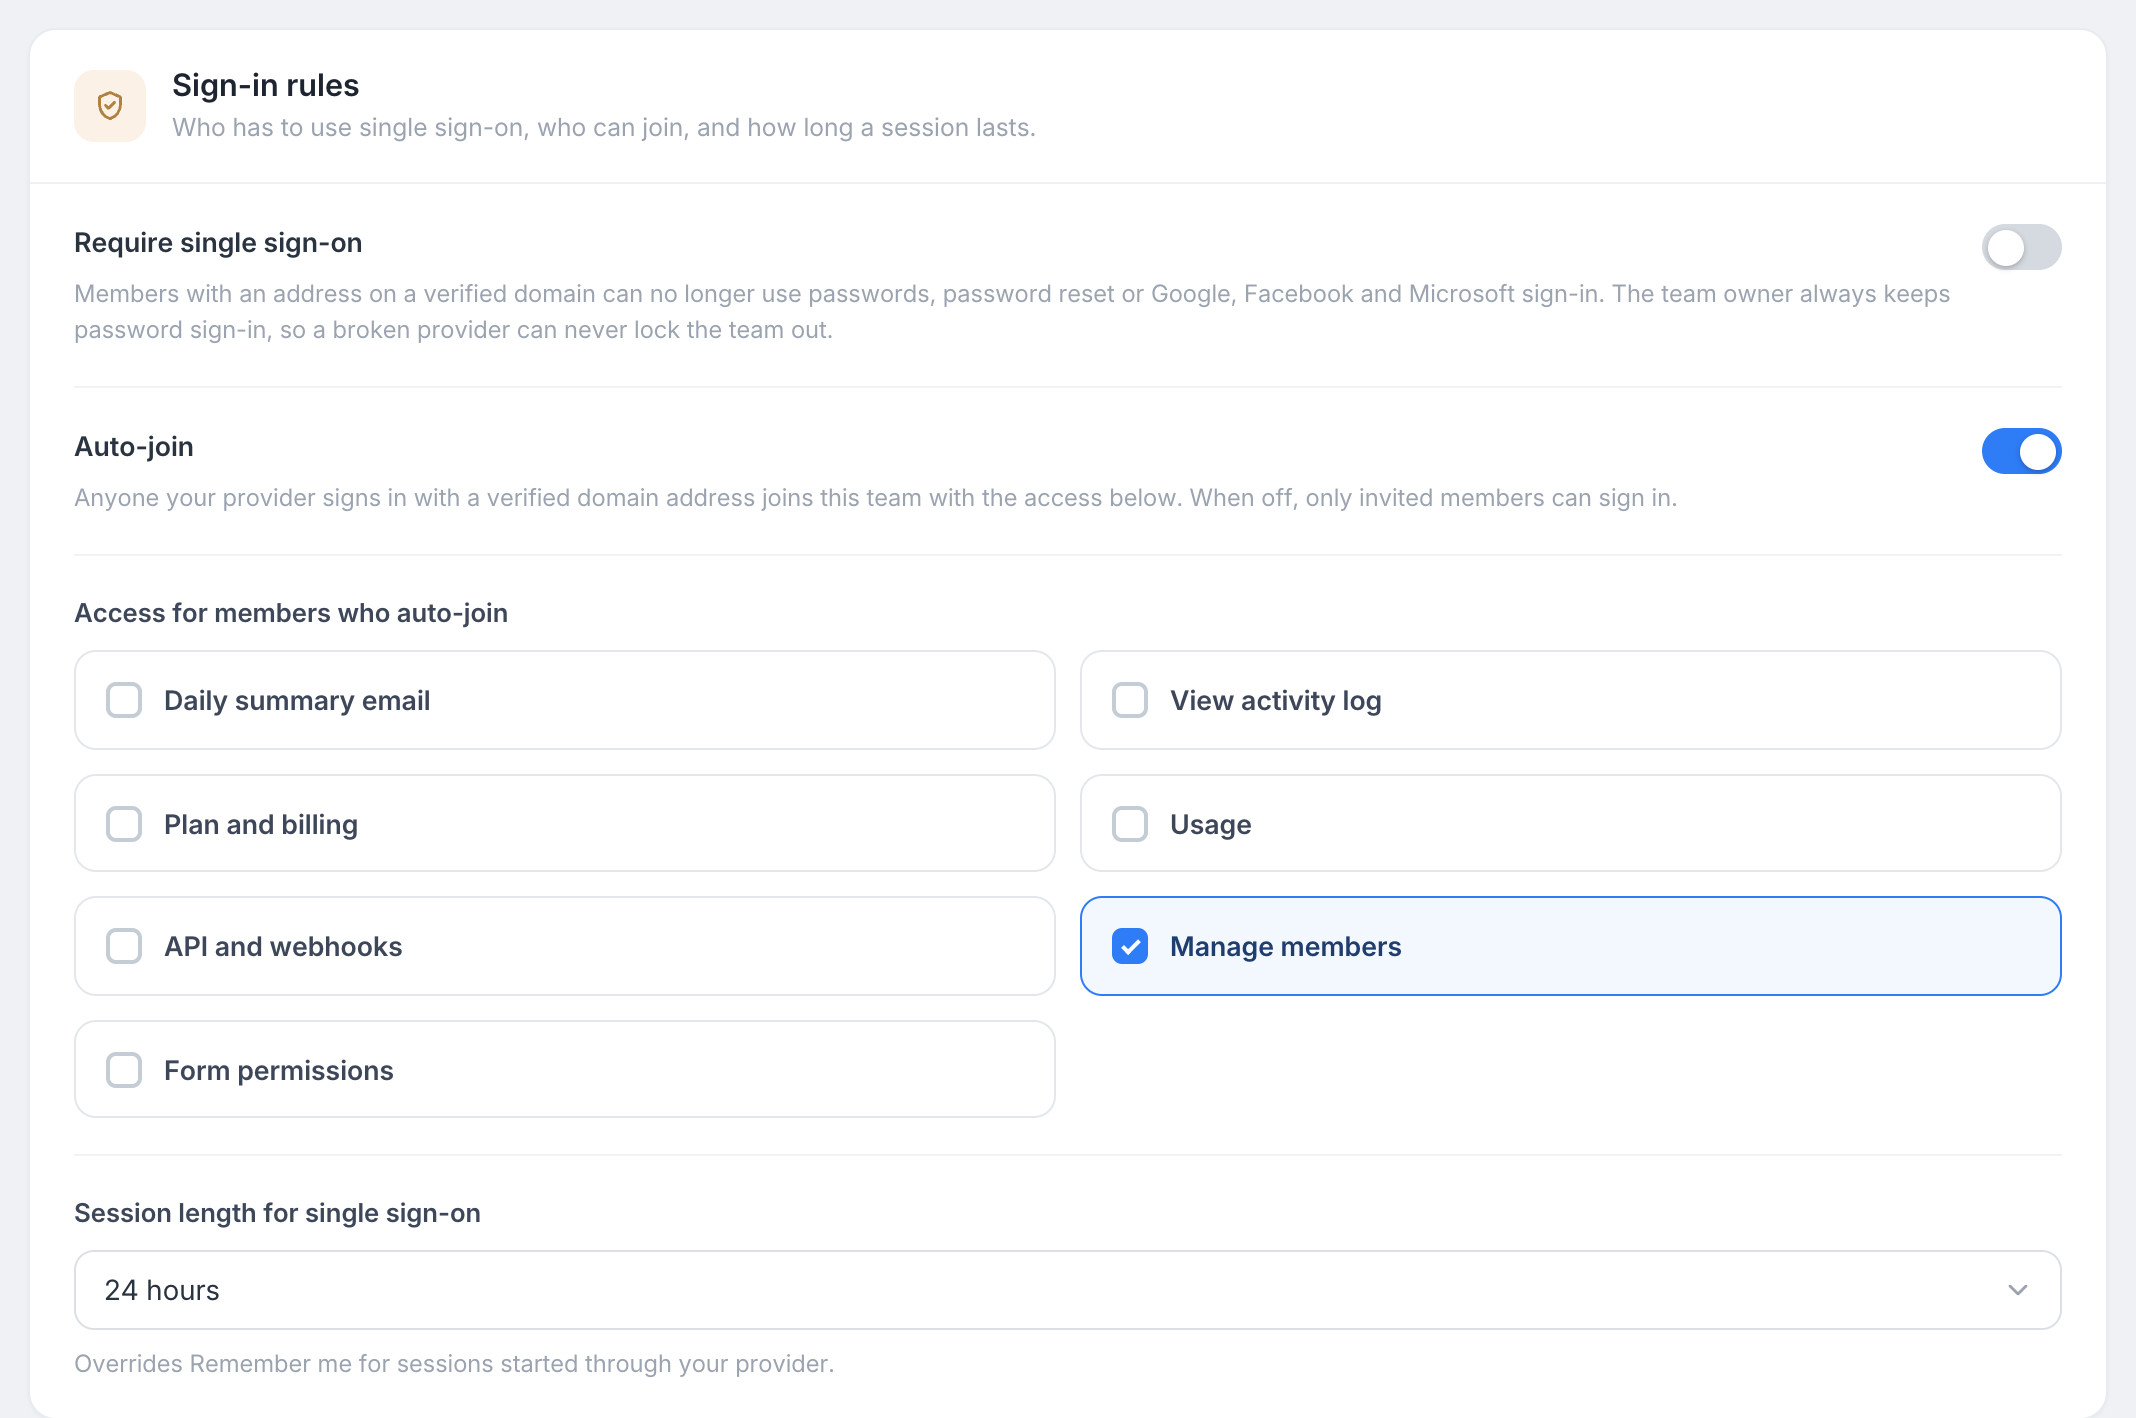
Open the Sign-in rules tab to decide how strict single sign-on is. Click Save rules after a change.
-
Require single sign-on
Members with an address on a verified domain can no longer use a password, password reset, or Google, Facebook and Microsoft sign-in. Signing up with such an address is sent to single sign-on as well. This option is available once single sign-on is on.
NoteThe team owner always keeps password sign-in. If your identity provider is ever misconfigured or unavailable, the owner can still get in and fix the settings.
-
Auto-join
When on, anyone your provider signs in with a verified domain address joins your team automatically. When off, only people you have invited from Team Members can sign in; everyone else sees “You are not a member of this team yet.”
-
Access for members who auto-join
The access a new member receives when joining automatically, for example View activity log or Manage members. You can change a member’s access later under Team Members.
-
Session length for single sign-on
How long a session started through your provider lasts: 8, 24 or 72 hours, or the same as other sign-ins. Teams in HIPAA mode keep their stricter rule: the session ends when the browser closes.
Manage single sign-on
- Change the connection: edit the values on the Connection tab and click Save connection. Single sign-on stays on. Run Test connection again to confirm the new values work.
- Rotate a SAML certificate: paste the new certificate below the current one. Both are accepted until you remove the old one.
- Turn off: click Turn off in the status card. Your settings are kept, and members sign in with their password or social account again.
- Remove: click Remove single sign-on at the bottom of the Connection tab. This deletes the connection and the domain claims. Accounts and team memberships stay. Members who were created through single sign-on have no password yet; they set one with Forgot your password on the login page.
Good to know
- Multi-factor authentication: your identity provider enforces it. Members who sign in with single sign-on are not asked for the FormCan two-factor code as well.
- Email address changes: a member whose address is managed through single sign-on cannot change it in FormCan. Change it at your identity provider.
- Seats: a member who joins through single sign-on uses a seat like any other member. When the team is full, the sign-in is refused until you free a seat or upgrade.
- HIPAA teams: after the inactivity lock, a member who signed in with single sign-on continues with single sign-on instead of typing a password.
- If your plan changes: on a plan without single sign-on, existing sign-ins keep working, the settings become read-only and Require single sign-on is paused until you upgrade again.
Troubleshooting
| Message | What to check |
|---|---|
| “Single sign-on isn’t set up for this email domain.” | The domain of the email is not verified for any team, or single sign-on is turned off. |
| “The identity provider sent an email at @example.com, which is not one of your verified domains.” | The account’s email at your provider is on another domain. Verify that domain too, or use an account on a verified domain. |
| “The identity provider did not send an email address.” | The email attribute or claim name does not match. Run Test connection and compare the names with Advanced on the Connection tab. |
| “You are not a member of this team yet. Ask your team owner to invite you.” | Auto-join is off. Invite the person from Team Members, or turn Auto-join on. |
| “Your team has reached its member limit.” | Free a seat or upgrade the plan. |
| “The identity provider returned a token we could not verify.” | OpenID Connect: check the issuer URL, the client ID and the client secret. |
| “The identity provider response was rejected” | SAML: the entity ID, the ACS URL or the signing certificate does not match. Load the metadata again or paste the current certificate. |