
Set up single sign-on with Okta
Tabs
FormCan connects to Okta with OpenID Connect or SAML 2.0. Both take about ten minutes. OpenID Connect has fewer values to copy; SAML 2.0 is the one many security reviews ask for. Either works with the Okta dashboard tile.
For an overview of the Single Sign-On page, see Single sign-on (SSO).
Before you begin
- You are an Okta administrator who can create app integrations.
- In FormCan, you are the team owner or a member with the Manage members access.
- In FormCan, open your team menu and select Single Sign-On. On the Connection tab, pick Okta and the protocol you prefer. Keep this page open: it shows the values Okta needs, each with a Copy button.
Option 1: OpenID Connect
In the Okta Admin Console
-
Go to Applications > Applications and click Create App Integration.
-
Select OIDC - OpenID Connect, then Web Application, and click Next.
-
Enter an app name, for example
FormCan. Keep the grant type Authorization Code. -
Under Sign-in redirect URIs, paste the Sign-in redirect URI from FormCan. Leave the sign-out redirect URIs empty.
-
Under Assignments, choose who may use the app, then click Save.
-
Optional, for the Okta dashboard tile: on the General tab, edit General Settings. Set Login initiated by to Either Okta or App, tick Display application icon to users, and paste the Initiate login URI (start URL) from FormCan into Initiate login URI. Save.
-
On the General tab, copy the Client ID and the Client secret.
In FormCan
-
Under 3. Values from your identity provider, enter the Issuer URL. It is your Okta org address, for example
https://your-org.okta.com. This is the address of your Okta Admin Console without-admin. -
Paste the Client ID and the Client secret.
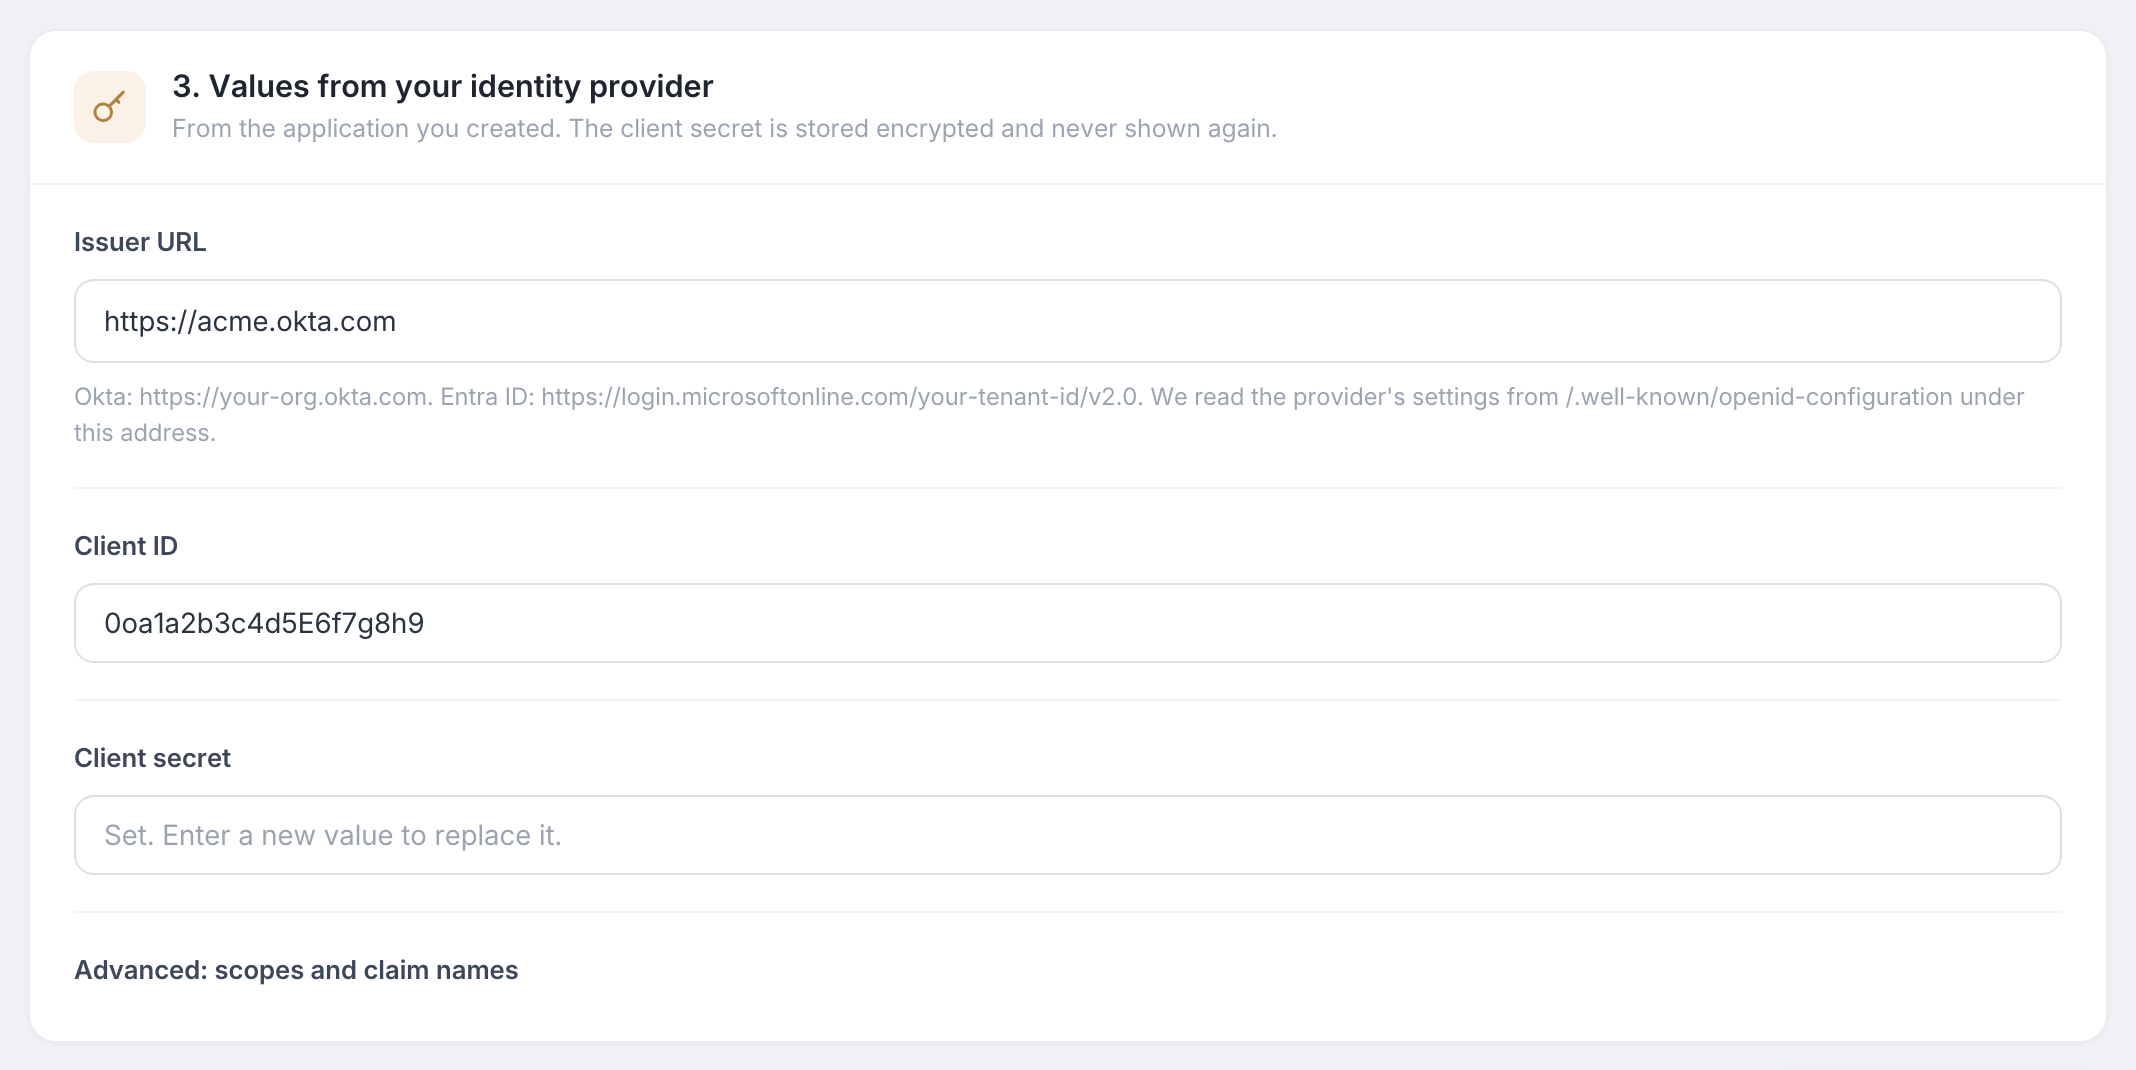
-
Click Save connection.
Option 2: SAML 2.0
In the Okta Admin Console
-
Go to Applications > Applications and click Create App Integration.
-
Select SAML 2.0 and click Next. Enter an app name, for example
FormCan, and click Next. -
In Single sign-on URL, paste the ACS URL from FormCan. Keep Use this for Recipient URL and Destination URL ticked.
-
In Audience URI (SP Entity ID), paste the Entity ID from FormCan.
-
Set Name ID format to EmailAddress and Application username to Email. Click Next, then Finish.
-
On the app’s Sign On tab, under Attribute statements, click Add expression three times and add:
Name Expression emailuser.profile.emailfirstNameuser.profile.firstNamelastNameuser.profile.lastNameNoteOlder Okta consoles ask for the attribute statements inside the wizard, written as
user.email,user.firstNameanduser.lastName. -
Still on the Sign On tab, copy the Metadata URL.
-
On the Assignments tab, assign the people or groups who may sign in.
In FormCan
-
Under 3. Values from your identity provider, paste the Metadata URL and click Load from metadata. FormCan fills in the entity ID, the sign-on URL and the signing certificate.
-
Check the values and click Save connection.
Check the authentication policy in Okta
Okta decides which sign-in factors an app requires. On the app’s Sign On tab, look at User authentication. If the policy asks for a factor your users have not set up, Okta refuses the sign-in before FormCan opens. Pick a policy your users can satisfy.
Verify your domain, test and turn on
-
On the Email domains tab, add your company domain, create the TXT record FormCan shows at your DNS provider, and click Verify.
-
In the status card, click Test connection. A window signs you in through Okta and shows the email, name and attribute names FormCan received.
-
Click Turn on single sign-on.
Members can now click SSO on the FormCan login page, open the start URL, or use the FormCan tile on their Okta dashboard. See Sign-in rules to require single sign-on or to let new members join automatically.
Troubleshooting
| What you see | What to check |
|---|---|
Okta shows 400 Bad Request with access_denied before FormCan opens |
The user is not assigned to the app, or the app’s authentication policy asks for a factor the user has not set up. |
Okta shows an error about redirect_uri |
The Sign-in redirect URI in Okta differs from the one on the FormCan page. |
| “The identity provider sent an email at @example.com, which is not one of your verified domains.” | The Okta user’s primary email is not on a verified domain. |
| “The identity provider returned a token we could not verify.” | The issuer URL, the client ID or the client secret is wrong. |
| “The identity provider response was rejected: Signature validation failed” | Okta has a new signing certificate. Click Load from metadata again, or paste the new certificate below the old one, and save. |